Posted on Leave a comment

From the Editor’s Desk: A Guide to Editing and Editors

Editors are not all the same. We focus on different things, specialize in certain areas, and tweak for specific issues. Here’s a brief overview of some varieties of editing.

First, some terms to clarify: proofreading, copyediting, and editing.

Proofreaders fix surface-level issues to make the sentences grammatically correct (spelling, punctuation, and basic sentence structure—maybe). They do not make your words shiny or impressive or even more effective—they simply bring them up to code. Proofreading typically occurs after your manuscript has been accepted, edited, and even typeset—proofreaders scan for last-minute typos and errors one last time before sending your work out the door to face the public.

Copyeditors and editors generally perform the same service, but pay attention to the title of the service offered. What does the editor call her services? (Note: Copywriters create text for advertisements and marketing materials. Some of them also edit on the side, but copywriting ability does not automatically mean editing skills). They fix the errors in your writing, but they also rework sentences to show their best side to readers. A good editor will whip your prose into shape without losing your narrative voice in the process (it’s still you—but dressed to impress with your perfect hair and shiny smile!).

Editing Levels

Most editors will offer a wide selection of services for a variety of prices. Do some research online to make sure your potential editor is within the suggested price points for services and that you understand what they will be doing for that price point.

  • Developmental Editing—This service provides feedback on your idea/outline/concept/really rough draft. This process does not adjust for sentence structure, focusing on the story and world as a whole to evaluate how well it works for readers (so far). This editing should be done before any line editing or copyediting (Why polish sentences that may not make it into the final version?).
  • Line Editing—This service focuses on your work line by line, tweaking your words so the sentences are stronger. Most line edits will fix basic grammar in the process (run-on sentences, obvious misspellings), but the focus will be on strengthening each sentence to pack the most punch. Editors will note repeated words and phrases (perhaps sending your document back with all 1147 extra Thats highlighted in yellow), drawing your attention to your bad habits so you can improve as a writer. Editors will smooth tone and narrative pacing in the process, tightening dialogue and cutting out any slack. Editors will comment on confusing scenes (and may or may not fix them for you).  If you want to improve your writing style with feedback and tips, line editing is for you. Editors will usually leave comments throughout that promote your growth as a writer.
  • Copyediting—This service focuses on grammatical issues, bringing everything up to code (and sometimes above). Copyeditors may provide a style sheet with explanations of common issues for you to review afterward. Copyeditors will also pay attention to continuity—both in story (characters, place, setting, etc.) and format (hyphens, capitalizations, spelling, etc.). If you just want someone to fix your stuff and call it done without much feedback (beyond a style sheet), copyediting is for you.
    • Yes, one person can provide both copyediting and line editing—but you have to say that is what you want.
  • Format Editing—If you are writing non-fiction or academic work, you may need help with formatting according to specific style guides (MLA, APA, Chicago, etc.). Format editors ensure that your document adheres to the newest requirements for that style. They do not provide feedback on what is said (unless you ask for that—and it’s extra!); the focus is on citations, headings, and some sentence structure issues (APA requires specific tenses in certain situations; MLA has rules for person usage, etc.).

Pricing

Editors charge by the hour or by word count/page. Be clear about which method your editor uses—and what is meant by each one. The Editorial Freelancers association is a great resource when considering standard rates.  

For example, I generally charge $10 per page for line editing (my page is roughly 300 words in Times New Roman 12-point font, double-spaced—no quadruple spaces between paragraphs). I look at the entire document and round down (so 96 double-spaced pages/26,936 words would get rounded down for front matter and chapter spaces to 90 pages—$900). To edit the same piece for formatting, assuming the references fill about 12-15 pages—pretty standard for a thesis or some dissertations—it’s much cheaper: only $5 page for APA ($450) or $3 page for MLA ($270). MLA has far fewer restrictions on tense—APA format means I have to read every verb; MLA means I skim for sources and headings.

Because I charge by page and not by time, you know the total cost upfront. Editors who charge by hour may present their fees differently (I would be very careful about expectations here). Note: if you are using an hourly editor, ask what programs they use, if any. I don’t use any automated programs to help me edit (I’m a luddite this way; no judgment—I just don’t like them), so my hourly rates would be much higher than someone who uses a program to help.

It’s critical to lay out your expectations with your editor. Explain exactly what you want and get a description of the provided service in writing.

To finish my example (and shamelessly self-promote), I also accept a deposit upfront ($50-$100) and the rest on delivery. I generally send an email overview with an overall response along with the edited manuscript (I use Word’s Track Changes so you can see everything).

Editors work in different ways—ask how yours operates before agreeing to anything! Communication is key!

Posted on

From the Editor’s Desk: Little Things That Make a Big Difference

I am both an author and an editor, and it’s important to know the difference when the time comes to switch roles. I can write my own work. I can edit other people’s work. I can kinda sorta maybe start to edit my own work. But ultimately, I’m never going to see all of my mistakes, so I need another pair of eyes on it if I want it to head into typeset error-free (or as error-free as any other book can possibly be!). That said, there are definitely things I can do to my own work to help the editorial process along. 

  1. Take a break. 

Yes, I said it. Walk away from the manuscript. Yes, I wrote it. Yes, I love it. Yes, I wrote it because it’s exactly the kind of book I like to read, but if I want an objective view as I tangle with my sentence structure and word use, I need to have some space (preferably in time, but also in distance, I suppose) between me and when I wrote the book. I’m not saying you need to hide it in a drawer for years, but give yourself a few days to let it settle before approaching it with your prepping-for-editor eyes. If you go directly from composing something to reading it, your eyes will see what you wanted to say, not necessarily what is on the page. Anyone who has written what they considered a semi-passable paper at 4am, printed it out, and then sat in that 8am class staring at a first line that is missing half the words knows what I am talking about. Give your brain a break to see what is actually there. 

  1. Prepare to re-read your book at LEAST twice. 

The first time you re-read your book, settle in somewhere comfortable, preferably soft, with a beverage of choice nearby. Your goal during this read-through is to read the book as a reader would. Immerse yourself in the world you created. Meet the characters anew. Make sure that the story goes where you wanted it to go (and tweak all those little annoying story details that no longer make sense now that the story is finished). Don’t stress out about grammar during this read-through. Focus on the story and the details. Gauge the plot, the pacing, the character development, and the dialogue. Appreciate your work as a whole. 

The second time you re-read your book, sit somewhere serious that you associate with work, like a desk or kitchen table. It’s time to read for grammar. That means doublechecking spelling and capitalization. Look for incomplete sentences or phrases that don’t make sense. Check your punctuation, especially around dialogue. Have your reference guides handy during this process (or use google if in doubt). Please do not rely on Word’s editor and even Grammarly. They try heard and mean well, but they are programs that do not know what you are trying to say. They may fix it correctly, but they may make it much worse. Trust your own voice first. And if you aren’t sure, like I said, google it. I guarantee you there is a blog or video about the exact thing you are wondering. If you have an editor friend, ask them (but don’t bombard them unless you plan to pay them for their time–wordsmithing is their job, and unless they spend all weekend asking you questions about your day job, don’t assume their knowledge is free unless they offer it). 

  1. Send it to an editor (or a very helpful beta reader).

I know I already said it, but this is the time to send your book to the editor. You’ve fixed as much as you possibly can, and the rest is for another pair of eyes. That’s fair. Beta readers and proofreaders are your friends at this point if you can’t use an editor. If it’s all on you this time, consult some references. I always recommend Woe is I by Patricia T. O’Conner for grammar questions and Eats, Shoots & Leaves by Lynne Truss for punctuation issues. I can now also recommend 10 Steps to Save Your Editor’s Sanity (available for pre-order from Accomplsihing Innovation Press). 

  1. Read it one more time. 

Oh, come on. You’re not sick of it. You love it. Enjoy it one more time and see if anything awkward or weird jumps out at you. Take a moment to appreciate this moment. You created a new story and are ready to release it into the world. You rock.

  1. Now, start over with a new story!
https://accomplishinginnovationpress.com/product/10-steps-to-save-your-editors-sanity/
Posted on

Stop Giving Condolences on Revisions

A woman with brown and blonde hair smirks at the camera.

Though the novel has now moved onto the Editor’s Desk, I couldn’t believe what I was hearing from my fellow authors when I had told them I was in revisions for The Assassin’s Saint under my pen name V.C. Willis. It confused me. I was met with many “I’m so sorry” and “Oof! That’s rough” instead of the expected response of excitement that I felt. Feeling something had to be said, I took to social media and posted my thoughts and reactions to this whilst giving some proper advice, and support for those of you who feel condolences are needed.

Revisions VS Self-Editing

Editing is the final step before it hits the actual editor’s desk. Trust me, it’s impossible to see everything without a second pair of eyes. Revisions however is what happens between emptying the initial draft (rough and/or first draft) onto the notebook or word document. What follows is the tribulation and excitement that seems to either haunt most writers, or worse, send them into a spiraling black hole of grief that is on par with someone dying.

It’s ok. I can easily see why that happens. You would think after painstakingly prying the story from the depths of your mind and imagination, that you would be able to move on, but you can’t. In this way, yea, condolences may feel very on point. Moving on when you suddenly lose someone is very similar to the sensation of: 

“I finished, but I’m not, and I just want to move on to the next story but can’t because [insert muppets hands waving about] emotional distress is still happening with this story!”

Just remember this is not the time to be the grammar king/queen nor aim to polish your work. I know, that feels … wrong … but I assure you, this will make sense in the next few paragraphs!

It’s Not a One-and-Done Process

First mistake I am noticing is that many authors are thinking or forcing the concept that a revision is a one-and-done process. No. Please don’t do this to yourself. Revision is like combing tangles out of a wily little girl’s hair. Prepare for a long process that may even threaten to time spent getting that draft written. You will be combing through this one section or focal point at a time, and you might have to call for help or research or gather additional tools. I know, that sounds frightening, and it shouldn’t. 

This is meant for you to take the time to decide on several factors. Now that you can see all of your story, the first sweeps of the comb should be checking that writing style or voice you developed at the end of the draft. For example, your first few sweeps should do the following:

  1. Go back, make that voice stronger and more consistent from start to finish based on the voice and writing style created by the end of the draft. Make that prose pretty! With everything in place, you can take the time now to adjust the way you are telling the story to really bring out strong prose or create some where none resided.
  2. Make sure what crazy-sauce that was in your head really did make it on the page for the reader. I can’t tell you how often we are unaware we left vital information unwritten because “I knew it off the top of my head” thanks to yammering from imaginary friends.
  3. Summarized paragraphs that may be best as fleshed out scenes and chapter(s). This is probably the most important thing to be doing in those first several comb throughs. I know this is one of my biggest issues that comes up time and time again. Honestly, after recently revising The Assassin’s Saint I realized how much stronger my writing has gotten and that it’s nice to first empty the story out, see what writing style/voice I have, then flesh out these moments more accurately. Who cares I had to have six new chapters between Chapter 2 and 3! The story benefited from the readers experiencing things and I didn’t struggle to write it now that I know what’s happening!

How to Break It Down

Now, how do you get the revision ready for self-edits and eventually the editor’s desk at the very least. BREAK IT DOWN. We are now on the rounds of revisions that tighten our craft. We’ve expanded, deleted, and strengthened the bones and added the muscles. These comb-throughs are intended to build up the muscles, put the skin on the beast we’ve written. Maybe even add some tattoos or piercings. Whatever you want, it’s your story. Here’s some ways I like to polish off revisions before diving into grammar and commas and things I am not so strong at mastering.

  1. Foreshadowing – I talk a lot about foreshadowing and this is a great focal point for a revision round. Now that the plot is clear, there’s plenty of hints and winks you can add in to really build the reader’s immersion and anticipation.
  2. Dialogue – This can be very telling. Some authors go as far as only reading the dialogue to see if they can still grasp what is happening in the story from that much. It’s a great way to check for meaningful and story-provoking dialogue content.
  3. Character – Pick your main character, secondary, love interest, or villain and start a comb through only paying special attention to their actions, dialogue, and narrative meant for them. It’s amazing how often this simple routine has helped me catch holes even in my plot! Try it out!
  4. Story Beats or Plot Points – Make sure you got it all in there and that the order of events makes sense. Sometimes recapping these can let you know if you’re missing something or need to adjust the story in some way. In fact, I realized between this and character revision I was missing an entire subplot and had to write that into the story. These comb-throughs aren’t always an easy fix, but they are often necessary.
  5. Narrative and Setting – Much like the dialogue check, start reviewing just this section of the story. Are you establishing a change of room, scene, and location? Does the narrative support what is unfolding, match the emotions of what is happening while instilling that tone into your readers? Are you leading the reader into the scene and to the next scene with strong enough transitions? These are all important factors that should be one of the many rounds of revisions you perform.
  6. Reader Immersion VS Character State – This is one I do, and I don’t know how many authors really dig their fingers into this. It’s not something I see written or talked about often but I fret frequently over this concept. My last few rounds are often making sure that the emotional states of my characters and readers are where I want them to be chapter by chapter. I find myself tweaking the length of sentences, changing out word choice, and even adding/deleting anything that might damage/improve the pacing. Delivery of those tense moments mean everything in my own work where broody, angsty characters roam and dark fantasy vibes tend to prove PTSD worthy. Ask yourself often if you feel what was written invokes the emotional state the reader should have before the next chapter, and if not, time to massage content.

Repeat after me:

“I am not grieving! 
No one has died (besides [insert character(s) names here])! 
I don’t need condolences and certainly shouldn’t be giving them!
Revision rounds are where my prose turns pretty!”

Good! Do you feel better? It’s not a race, it’s revisions. You will have to comb these tangles out a few times before it’s ready for you to work grammar magic. That’s ok. Take it one step at a time, break it down, and watch how strong your story becomes.

Discover More

Like the advice and information you see here? Follow me on social media where I often post videos talking about and discussing my own tribulations as well as encouraging others to excel. From advice about writing, book design, to insight on my own work and creations that may prove inspiring. Stay connected here at WillisAuthor.com OR https://linktr.ee/WillisAuthor

Posted on

5 Reasons You Should Pay Attention to Book Formatting

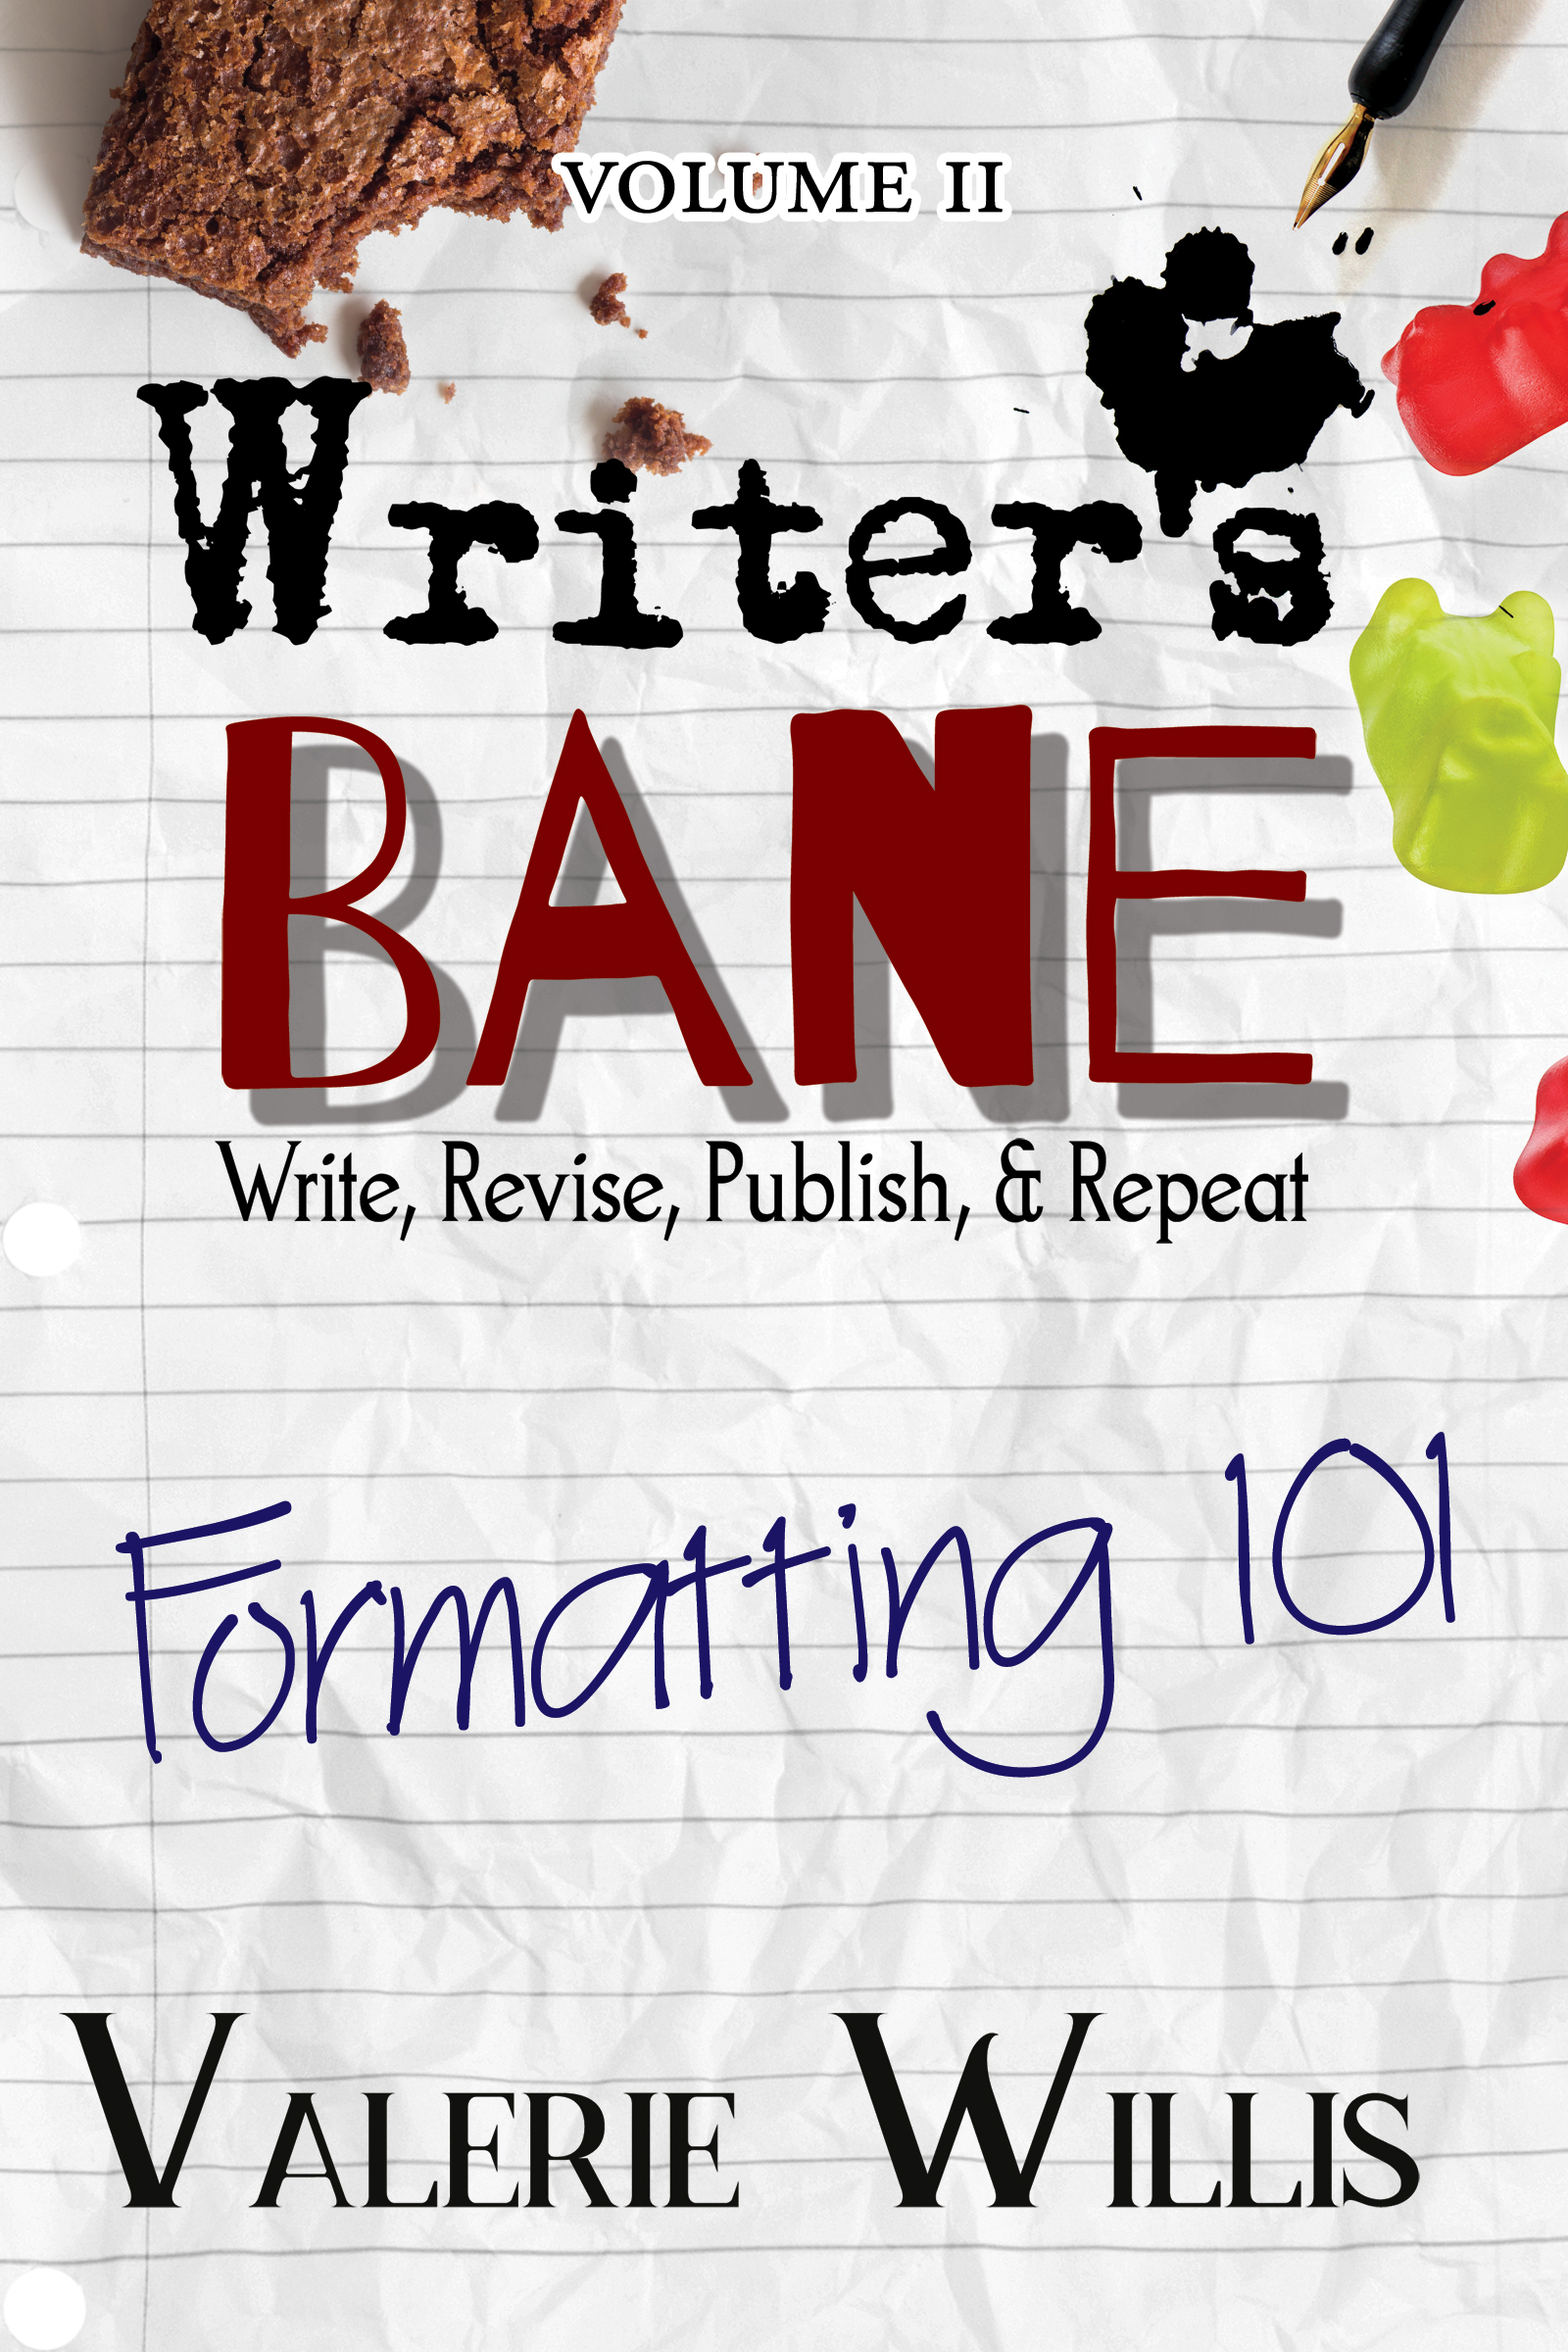
It’s strange to think about the fact that book formatting and layout still shows signs of those early printing press books in the 1400-1500s. Over the centuries, academia has evolved that format to create standards that began to take hold as public consumption increased in the 1800s. Regardless, your book’s format has to fall in line in a lot of ways for several reasons which include guiding and navigation of content, pacing of a story, placement on bookshelves, limit print issues, and reader immersion. If you haven’t discovered Writer’s Bane: Formatting 101, you’ve been missing out on a lot of answers to questions and even a stronger understanding of how impactful formatting is on a book. This includes what goes inside your book, how to prepare a manuscript for a typeset, and how to design the interior of your book. 

Guiding and Navigation of Content

Imagine a world where books didn’t have an expected chronological order to the content presented. I mean, no chapter numbers, no headers, and no page numbers. PURE CHAOS! A book’s format has an expected order and rhyme and reason. If they didn’t, it would be impossible to grasp where the information can be found. Even in “Choose Your Own Path” novels they have clearly written instructions and rely on guiding a reader via the page numbers. Let’s also be mindful that, for example, page numbers should land in the same spot throughout a book, but if this was inconsistent, you would be lost especially in a textbook. 

Keeping these navigational devices in your book in place and consistent means a lot. There have been a few books where page numbers were non-existent, and with so much automation in even word processors, WHY? How am I supposed to know where I am and what page my bookmark fell out? CHAOS. And worse, this example had a Table of Contents with numbers. PURE CHAOS. Be mindful of using all the navigational tools not for you, but your readers.

Pacing of a Story

This starts at the manuscript level and can skew how a typesetter or book designer “translates” the final book format, but be sure to use double returns and marking line breaks (***, #, or some other consistent searchable indication) in the right way. 

For example, double returns often come into play when a flashback starts or ends, a change in point of view or head hop happens in the moment or scene with no jump in time, or in non-fiction change in thought or moving on to the next thought within the same subject matter for that section/chapter. 

As for the line break, this is often where an ornamental icon will be added into a book. These often signal a change or passing of time in fiction work, change in location or jumping to a character not in the current scene, or the start of a new subject matter in a more significant manner in non-fiction. 

Placing these consistently and using them for the age-old expected reasons can help how a reader and story paces visually and limit any confusion. Imagine if neither of these existed in the novel you’ve been reading? MAYHEM!

Placement on Bookshelves

If you fail to fall in line with CMS or similar styling (Chicago Manual Style, APA, MLA, ect.), there’s a good chance that your book will not be chosen for bookshelves in commercial stores, libraries, and schools. It’s not uncommon for schools to require books to be in APA for medical books and degrees while other textbooks on certain matters for researched content may want MLA. Overall, commercial or public consumption often falls under the CMS standards though they aren’t as strict as academic and textbooks can be. These tend to be far more artful and allow more creative means. That doesn’t mean go hog wild and go above-and-beyond to break the formatting until it’s no longer recognizable. We’ve spent centuries to develop these styles and for good reason. 

Limit Print Issues

Margins and layout are also defined under these styles. Not only does it help identify the anatomy of what’s on the page, but these often aid in keeping the content from printing off the page or deeping into the spine of the book. Headers and footers play dangerously close to the edge, but the core content never should come close to this. The information is far more vital if the page prints crooked, right? Often book designers will have to adjust the margins dependent on the printer and press they are sending the file too. For example, for a perfect binding or glue binding Print-on-Demand book we typically set the inner margin with no bleed. Meanwhile, for Smythe Sewn or sew-bound hardcovers we would have to add bleed/trim/margin for stitching and binding to take place. A lot of math gets involved in those final moments of a book’s design that can impact the final look, so be mindful that anything that is pushed to the edge or super close has a high potential of “being lost” or cut off completely. 

Reader Immersion

Lastly, the biggest factor in all of this is the impact your consistency in formatting has on the reader. If the styling and broken style rules are too many, the reader will be confused and most likely will stop reading or even abandon the book. Again, for CENTURIES, books have an order and cadence that readers for GENERATIONS have been taught to read. Breaking the normal expectation in certain umbrellas can have detrimental effects to how readers feel and perceive your book and its content. Bad reviews, low sales, and social media thrashing will be just a few of the impacts here. The way a book is formatted is designed to optimize COMMUNICATION and to alter that has dire consequences and breaks the connection with the readers. Immersion can be granted, but the moment the font changes without warning, or the content isn’t labeled as expected, the reader gets distracted or frustrated. Remember, you’re not formatting for you, but for the audience. Don’t cause chaos!

Discover More

Like the advice and information you see here? Check out the Formatting 101 textbook here at: https://4horsemenpublications.com/product/writers-bane-formatting-101/ . This book holds a variety of answers for those seeking to become typesetters, looking to self-publish their book, or simply want to learn how to communicate and prepare their manuscripts to get the most out of their designers. The Writer’s Bane is a curse and passion, both a want and need to tell a story. In this volume, you will learn the importance of preparing a book for layout as well as laying it out in a way that appeals to your readers of any genre including picture books, chapter books, fiction, memoirs, textbooks, workbooks, and everything in-between.

Posted on

From the Professor’s Desk: Sentence Diagramming 101

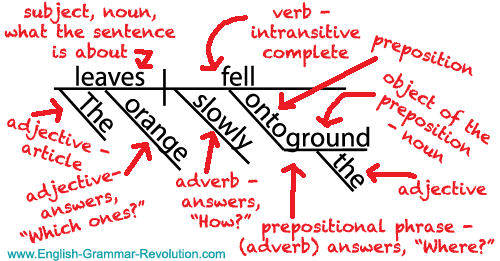
Do you ever wonder about what’s under the hood of the English language? English is a rich language with a convoluted history and tons of inconsistencies, but contrary to appearance, it does actually have rules that organize the way we put our words together. One way to visually explore the way English functions is to use a technique called sentence diagramming. 

Some of you may remember traditional sentence diagramming from some long ago class in elementary school or think of it as something you did for a day in grammar school during the 80s. Yes, sentence diagramming has been around for a while (since the 1900s!), but it’s still relevant if you want to think structurally about the way English works. 

Sentence Diagramming 101: Fun with Linguistics (and Movies!) is a great resource for anyone interested in understanding the underlying structure of the English language.

“A surprisingly fun jaunt into the convoluted wilds of the English language!”

Sentence Diagramming 101: Fun with Linguistics (and Movies) explores the relationship between words using traditional sentence diagramming and amusing movie references. Inside this textbook, you’ll find detailed explanations as well as 50+ film-focused practice exercises, and on the companion website, you can explore the answer key, informative videos, additional practice, and lively discussions about the English language.

One abiding question often accompanies any discussion of traditional sentence diagramming (Reed & Kellogg): does sentence diagramming create better writers? This book’s answer: Maybe. If you think of the English language as a car, think of this book as a look under the proverbial hood of the language. Someone may know the names of all the parts and how they work together to make the vehicle move when the gas pedal is held down-but does that knowledge create a better driver? Perhaps. Perhaps not. Perhaps that driver will explain spark plugs while they drive straight off a cliff.

Such is also true of writing. English can be messy, filled with archaic bolts and cobbled coils, but somehow, it still manages to get users where they want to go. Hop in and enjoy the ride!

A great primer for writers, word enthusiasts, and those seeking to understand the fundamentals of English grammar, this textbook breaks down complicated ideas into digestible pieces.

Topics include:

  • The Basics: Parts of Speech and Word Function
  • Sentence Patterns
  • Phrases, Verbals, and Clauses
  • Sentence Types
  • Weirdness: Questions, Commands, Expletives, Poetry, Made Up and Repeated Words

Additional features:

  • ADA Compliant
  • Free Companion Website with Video Overviews, Answer Keys, Practice Explanations, Additional Practice, and Language-Focused Discussions

Get under the hood of the English language with Sentence Diagramming 101!

Posted on

From the Editor’s Desk: Tips to Save Your Sanity During Editing

It’s time. You know it. Pour yourself a drink (whatever liquid gets you through the writing process), put on some comfortable clothes, and settle down in front of the computer. Editing is never easy, but there are some general things you can do that will make it easier the next time you finish a book. Here are some general tips to get you through this round of editing:

1. Read. Read in your genre. Read outside of your comfort zone. Read established writers with distinctive voices. Read emerging writers with astounding vision. 

2. Learn the rules. You can’t effectively break the rules of grammar without knowing them (otherwise your clever fragment may just look like a mistake!). Take it slow, but take the idea of learning to wield your tools, your words, seriously. Tons of books, blogs, and videos cover the rules. Check them out! I’m a fan of the classic Eats, Shoots, & Leaves: The Zero Tolerance Approach to Punctuation by Lynn Trusse. I also recommend Woe is I: The Grammarphobe’s Guide to Better English in Plain English by Patricia T. O’Conner.

3. Read your work out loud … backward. Yes, I said backward. Start with the final sentence, find the capital letter that starts it, and read that sucker aloud all the way to the end punctuation (period, question mark, exclamation mark). Is it a complete thought? Does it make sense? Cool. Go back or up a line. Find the previous sentence and repeat the process. Reading your sentences in isolation forces you to look at them one-by-one (instead of the way you read the story). You likely won’t do this for the entire thing, but you can put a serious dent in troublesome areas this way.

3a. Live with someone? Or have a very expressive pet? Read your story out loud and watch their reaction. If their expression is confused, mark that spot to revise later. If you stumble, mark that part to revise later. You’re not narrating here (though I suppose you could if you’re supper confident in your splicing skills); you’re reading for flow and comprehension. 

4. Take breaks. Editing is not a one-and-done event. It can be a marathon of late nights/early mornings and five-minute breaks from work (and lots of tea if you’re me!). It’s best accomplished in small chunks with a specific focus. If you read your work straight through looking for all of the things, you will find some of the problem stuff—but definitely not everything (not without making yourself crazy first!). 

5. At some point, your manuscript is finished. Let it go. Yes, you could make it better tomorrow—but how many tomorrows are spent re-working something when you could be on to your next story? Academics say papers are never done—just due. Give yourself a deadline and stick to it. Find your “good enough” point and watch Frozen (Let it go!!!). We will never get to see it if you keep tinkering with chapter five. 

6. Remember that your story is worth telling. No one can tell it like you can. No one else can do what you can. Don’t give up. We need to read your words. Get it out in the world!

Oh, you wanted ACTUAL steps on how to do this? Well, conveniently enough, I already wrote that book, and it’s a bit longer than  a blog post. If you want specific step-by-step instructions on how to edit your book, check out 10 Steps to Save Your Editor’s Sanity, a helpful guide that walks you through the process of self-editing one task at a time!

Posted on

From the Editor’s Desk: How to Format Dialogue so It Doesn’t Annoy Readers

I know that you know this already, but something weird happens to authors when they write their own stories—they suddenly stop following any kind of formatting rules around conversations and just start throwing words and punctuation around like darts in a whirlwind. Writers, you know what dialogue in a novel should look like—I know you do. You’re readers. You’ve all seen this format hundreds of times. But I also know that there is a strange disconnect between seeing how something looks on the page when someone else—a famous author perhaps—does it and applying those same expectations to your own work. 

First, let’s talk about why this happens and then get into some guidelines to keep in mind when you are writing dialogue. Sometimes, this disregard for the rules happens for the simplest reason: writers assume someone else will clean up their messy words and formatting. “My editor will fix it for me.” After all, the author is the cook—she need not clean the kitchen as well. Maybe so. But cleaning up after your own words will remind you of the rules—how things ought to look—and you will be a stronger writer as a result. Yes, your editor can clean it up for you, but that person will do so at the expense of everything else, spending valuable time adding commas and lowercasing words instead of getting into the real work of editing. You are essentially paying someone a lot of money to do a menial task when that money could be paying for expert attention on other matters that would make your story better—not just bring it up to code. 

Another reason formatting may get wonky is because writers promise they will go back and fix it later—and then don’t actually go back and fix it. I know how it is. We writers may be a forgetful lot. We focus on other things, get sidetracked by other stories, fascinating characters yearning to break free, and we move on to the next one, never actually going back in and checking the capitalization in chapter two. Now, I know you love re-reading your stories. You wouldn’t have written it if you didn’t enjoy reading it (unless you’re writing to market or ghostwriting or something like that, but this blog isn’t for you, specifically). Read it again—except this time pay attention to your dialogue and tweak any remaining issues. 

This brings us to another reason for messy dialogue format: you’re just not sure. And that’s okay! Just ask. Or review the guidelines listed below. 

How to properly format dialogue in novel writing

  • Every time a new person speaks, indent on a new line: 

“What are you doing?” Samantha asked. 

“Rearranging matches,” Sebastian said, boredom seeping through his voice.  

“Why?” Samantha inquired. 

“I have no idea,” Sebastian admitted. 

  •  When a character speaks both before and after an interjection, the punctuation should follow like this:

“You never have any idea,” Samantha sneered. “That’s why I’m leaving you.” 

“You can’t leave me,” Sebastian replied, “because if you do, who will organize your things?” 

  • If there is more text beyond the conversation, it can stay in the same paragraph:

Samantha glared at him. “I don’t need anyone to organize my things,” she snapped. “I was just fine in my organizational skills before you came along. I don’t need someone to look after me like a child.” She scanned the library, haughty eyes taking in other annoying details of his obsessive behavior. 

“Huh,” Sebastian scoffed. “You couldn’t tell that from where I was standing, dear.” He turned away from his latest project to stare at her. As usual, her clothes were in disarray, her wrinkled pants and untucked shirt almost screaming her need for his guidance. “Come here, Sam. You look a mess.” 

“You could use a good mess!” Samantha shouted, stalking out of the library. 

  • All periods, commas, question marks, and exclamation points go inside the quotation marks.
  • You should never put “double” “quotation” “marks” next to one another unless you are making a list of quoted items—otherwise, “double quotation marks” is sufficient. 

As I recall, you told me, “I am busy,” “I have plans,” and finally, “I am dead. Please leave a message” the last time we talked about this.  

Review the Rules

  1. If you start a sentence with dialogue, capitalize the first letter of the spoken words but leave the rest in lowercase (except proper names). Put a comma at the end of the spoken words (inside the quotation marks) if it’s not a question or exclamation point. 

“I don’t know why you do this to me,” Sebastian pondered. He stared at the books lining the walls, face blank while his thoughts raced. “It’s only matches,” he whispered. 

  1. If you start with the tag (the “he said” part of the sentence), you should start the actual spoken words with a capital letter. Put a comma (if it’s not a question/exclamation) after the verb and before the first quotation mark.

Sebastian said, “She’ll be back.”

  1. If you interrupt a complete sentence with a tag, do not capitalize the words after the tag. If you have two separate sentences with a tag ending the first one, capitalize the second sentence.  

“I know she will forgive me,” he moaned, “eventually.” He glanced at the door, suddenly sure he heard her returning footsteps. “She’s coming back,” he whispered. “I know it.”

  1. If the spoken words are not a statement, put the question mark or exclamation point inside the quotation mark (as long as the spoken words are a question/exclamation). If the entire sentence is a question or exclamation, then put the marks outside the quotation mark. 

“Why do I put up with him?” she wondered, staring down the long hallway. “He’s such a jerk!” she snapped, hands fisting at her sides. “Those matches,” she mused, shaking her head, “make me absolutely crazy.” How dare he say she looked “a mess”? “It’s only matches” indeed!

  1. Unspoken thoughts should be italicized to distinguish them from spoken words. Consider having tags like “he thought” or “she wondered” so listeners to your audiobook can tell which parts are spoken aloud and which ones are internal thoughts. You don’t need it every single time, but for important moments, it can make things clearer to your listeners. 

Just one more box, Sebastian thought, emptying the matches onto the table

  1. Only spoken words go inside quotation marks—not reported speech. 

I remember when she told me she was leaving me, Sebastian thought, lips pursing as he began lining up the matchsticks. Perhaps I shouldn’t have said, “You look a mess”?

  1. When quoting someone else’s words inside a quote, use single quotes. 

“But why would he say ‘You look a mess’ to me like that?” she wondered, glancing down at her clothing. “I guess I should be glad he didn’t say ‘You look a “hot” mess’ after all.”

  1. If your character speaks for more than one paragraph (telling a story), don’t use end quotation marks until the character finishes speaking. This means you will not put quotation marks at the end and beginning of each new paragraph. 

That’s it! While we’re here, a few things to avoid when dealing with dialogue:

  1. Do not capitalize the word after the quote unless it’s a proper name: “Don’t do it like this,” She said. (“Do it like this,” she said.)
  2. Do not put periods between the quote and the speaker: “Don’t do this.” She added.  (“Do this instead,” she added). 
  3. Don’t use tag words that don’t actually signify speech: “This is so amazingly funny,” he laughed. Did he laugh those words? No. He laughed after he said those words. “This is so amazingly funny!” He laughed. (I added the exclamation point because he’s probably excited about whatever is so funny, but you could leave the period.) I keep seeing characters who shrug, chuckle, smile, and grin words (and that’s just creepy sometimes). Add the period and separate the words from the action. 

I hope this has helped shed some light on how to properly format your dialogue to save both your readers and your editor’s sanity!

Posted on

From the Author/Editor’s Desk: A Guide to Worldbuilding (Part Two: Worldbuilding 101–the Author Side) 

We’ve all been there, right in the middle of a tense scene, when we lose the flow of the writing because we need to figure out a detail, a world mechanic, a backstory, or another little thing that underpins the moment we’re crafting. Worldbuilding is a complicated task, a mixture of Big Picture Overviews and Nitty Gritty Details that require organizational skills and excellent recordkeeping–or I suppose, an impeccable memory, though I cannot claim that (especially after Covid broke my brain!). 

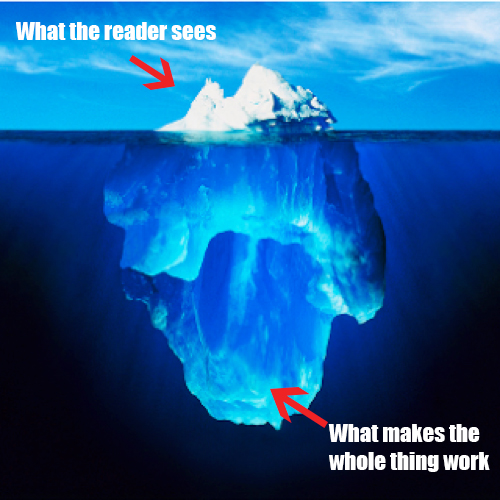
There are many ways to create your world–and there are just as many ways to record those details to doublecheck later on when you need to ensure consistency across a series. Some authors create massive world guides (which they can later publish as reader extras!), though I have seen some people spend so much time on this document that they never actually get around to the story they want to tell inside that world. Another downside of the massive world guide is that some authors get so excited about it that the story they meant to tell gets lost amid the new details and context they have developed. Think of this guide as an iceberg–yes, readers know there’s more under the water. They can explore it if they want when they read your guide (published after the series ends, of course), but remember that your job as the author is to tell a story. With Characters. And Conflicts. All these details are nice to know when the moment arises (so you can mention the former governor’s policies on tea taxes), but they aren’t the story you’re telling–and they should always just stay in the background. Just think–if your story is as popular as Tolkien’s Lord of the Rings, you’ll be able to publish multiple guides and early drafts to satisfy the superfans. Most of your readers, though, just want the story that rests atop the world you have created.  

On the other hand, some authors wing it, relying on memory and fans to tell them if they switched a detail. Readers tend to be annoyed by this style, but plenty of authors still do it. The downside, of course, is that once a story screws up a detail or world mechanic, it’s really hard to recover–and some readers will DNF and never forget. 

Let’s avoid all that unpleasantness and allow readers to get lost in the Secondary World of your story! One way to do this is to get a worldbuilding guide–a book designed to help you create your world. (Psst, I wrote one). 

Your worldbuilding guide should help you consider the following: 

  1. Big Picture issues like creation, gods, myths, legends, and heroes (and probably villains)
    1. Where did your world come from?
    2. Are there gods or god-like beings that affect your character’s lives? 
    3. What are common myths or legends your characters would know?
  1. Cultural issues like government, society, cultural practices, warfare, and appearance (and you probably need a map somewhere!)
    1. How does the world run? Who’s in charge? How does this affect your characters?
    2. What social practices are familiar to your characters? What behaviors would shock them?
  1. Social issues like economy, education, relationships, communication, technology, travel, and health and wellness
    1. What does it mean to be educated in your world?
    2. What is a “normal” relationship between characters?
    3. How do your characters communicate over distances?
  1. World Mechanics like science, nature, weather, measurements (time and distance)
    1. Does your world use a recognized system of measurement (Pounds, kilograms) or something you’ve created (wheels, boughs)?
  1. People and creatures who live in your world
    1. Who lives in your world? How do they get along with the other inhabitants?

If you like this layout, check The General Guide to Worldbuilding by JM Paquette (order HERE). This one also includes open-ended questions, guided activities, cool artwork, and a ton of resources like character cards, plot points, general notes, and top five lists. 

If you write in a specific genre, you may enjoy the themed Worldbuilding Guides, coming soon from 4 Horsemen Publications–Fantasy, Paranormal Horror, Science Fiction, and Romance. 

Posted on

From the Author/Editor’s Desk: A Guide to Worldbuilding (Part One: Secondary Worlds and Why We Care–the Reader Side)

We’ve all been there, right in the middle of a tense scene, when something in the story contradicts something we already know about the world, and boom–we’re sitting outside the story again, disappointed and a bit miffed that the author couldn’t maintain the magic. Whether it’s something complicated like a magical system or something simple like the song on the radio at the bar, the stories we read need consistent details to make the world feel believable. These little things all add up to create the word of the story, a world readers to crawl inside and explore. 

Tolkien talks about what he called the Primary and Secondary Worlds in his essay “On Faerie Stories” (where he basically defends fantasy as a worthy genre, among other things). The Primary World, of course, is the one in which you live, the one in which you now sit, currently reading these words. Perhaps the words are on your phone screen; maybe you’re waiting for a bus or curled up on a couch, nursing your morning coffee. Either way, odds are you don’t always find the Primary World to be the Best Thing Ever. For Tolkien, the Primary World is good because we all live in it, but it’s definitely lacking in certain aspects–and that’s why readers read Fantasy (or really anything imaginary at all). We want to escape the Primary World and spend some time in a Secondary World. 

Now, let’s pause for a moment, as Tolkien did, to examine that word “escape.” One of the easy criticisms of fantasy readers is that they can’t face the real world and have to run away into a book. I’m probably not alone in being told that reading so-called “escapist fiction” is some kind of cop-out, a weakness, a failure to accept the very real world around all of us. Tolkien disagrees, and in the most Tolkien way ever, of course, because he starts by examining that word “escape” (Tolkien’s love of words and philology knows no bounds!). He argues that there is a difference between what he calls the Flight of the Deserter and the Escape of the Prisoner. Readers of fantasy aren’t deserting reality because they can’t handle it. They aren’t running away. Instead, readers (and everyone else in the Primary World) are all prisoners of what can be, honestly, a pretty terrible place sometimes. For Tolkien, a devout Catholic, the Primary World is a fallen world, a kicked-out-of-Paradise world, and so of course, like anyone imprisoned, the inhabitants will long to escape–to occupy their minds with something not so depressing. Keep in mind that Tolkien lived through two World Wars (he fought in WWI and was one of a handful of survivors among his classmates). You don’t need to be Catholic to see that some days, the Primary World sucks–and the urge to escape into somewhere else, anywhere else, is a perfectly normal human reaction. It’s not that fantasy readers can’t handle the real world; it’s that the real world is often ugly and harsh–and humans need a break. A release. An escape. Who would deny a prisoner the chance to escape, at least in the mind?

So where are we prisoners, I mean, readers to escape into? The Secondary World. Where can we find that? Inside the writer’s mind, at first, but then through some artful magic, what Tolkien calls Enchantment, readers are also allowed to inhabit this Secondary World. And this world only works if it is consistent in and of itself. There must be rules, and the rules must be followed, or readers (and prisoners) risk being knocked out of the story forever, unable to enter it believably again. 

In other words, if people in the book’s world use the sun and candle rings to tell time, then someone shouldn’t say it’s 10:11pm. If people can fly on broomsticks, then that’s how gravity works (or doesn’t) in that world. The world should be consistent. Readers pay attention to the little things, the details, when they invest in a story. If authors switch out the small stuff, readers will notice, and then remember they are reading a book, finding themselves back in the Primary World rather than still lost in the Secondary World the writer has created for them. 

Another thing to keep in mind when discussing worldbuilding: willing suspension of disbelief. You may have heard this term somewhere in a literature course, but the essential idea is this: Of course I always know I’m reading a book. My fingers feel the pages, possibly my neck aches from staying in one position too long, I can hear the soft shuffle of the page as I turn it (or hear that little electric swoosh noise my Kindle makes when I turn on that sound feature). But sometimes, when the enchantment is done right, I can forget all that, and really lose myself in a story, falling headfirst into the world of the characters, blissfully watching their trials as the real world goes by outside the pages. In order to do that, though, I have to willingly suspend my disbelief. If I’m reading a book where people can fly, and I know that flying isn’t possible in the Primary World, I have to willingly and knowingly suspend my natural disbelief in the possibility–and just go with it. Often, people who don’t enjoy reading fiction have a hard time making this leap. In order to travel from the Primary World to the Secondary World, you have to leave your disbelief behind–and accept whatever rules the Secondary World has. 

Since we spent so much time on Tolkien, this is a good time to bring up the fact that while he enjoyed plays (and movies) in theory, he never “got lost” in them because he could never forget he was watching people perform either on stage or screen. He thought performers could never transport him the way words on a page could, the way his own imagination could. Either way, there is no transportation at all if the Secondary World isn’t coherent and complete in itself. 

Proper worldbuilding, creating a world behind the story that stands on its own and supports the tale being told, is critical if authors want readers to join them in a Secondary World. How does one create a believable world? As the old adage says, lots and lots of time and practice. And maybe a little help. 

Check out The General Worldbuilding Guide, coming soon from 4 Horsemen Publications (pre-order HERE).

In Part Two of this blog, I’ll delve into the nitty gritty of worldbuilding, and we can get you started on creating a viable Secondary World for your readers. 

Posted on

From the Editor’s Desk: A Guide to Ellipses

You wouldn’t think that three little dots would cause so much trouble… but here we are! An ellipsis is the mark of punctuation created when you join three periods together and hit the spacebar–your writing program should join the separate periods into a single unit of punctuation. 

An ellipsis indicates hesitation… and it’s really annoying when people overuse them. There are legitimate reasons for people to pause in your writing (especially during narration), but when someone always ends a sentence with an ellipses, it makes them seem uncertain about everything. 

A few ground rules: 

  1. An ellipsis includes three periods. Not two or four, but three. 
  2. An ellipsis can function as end punctuation. You do not need to add a period or question mark or exclamation point after it.  
  3. You use an ellipsis to indicate a pause in the sentence, a moment for a character to find the right word or decide how to proceed or what to say, or even for the narration to reveal something … slowly. 
  4. Generally speaking, treat ellipses like a word when they occur in the middle of a sentence or clause; that is, they get a space on either side. So if you begin … a sentence, and then continue the thought, it looks like this. 
  5. If the ellipsis occurs after a complete clause, put a space after it, but not before. So if I’m not certain how to do this… but eventually I read a blog and figure it out, it looks like this. 
  6. If the ellipsis ends the clause and the next sentence is its own thought, capitalize the first word after the ellipsis. For instance, if I am uncertain… Then I go home and read a blog about ellipses, this is how it would look. 

Ellipses in action

If the ellipses ends the sentence, it looks like this: 

  • Don’t get me wrong: I had a blast. I don’t know… It just didn’t spark anything, you know?
  • “I won’t let you paint my nails because…” Jordan thought for a moment. 

If the ellipse is in the middle of sentence, it looks like this:

  • He paid his bills, his taxes, bought what he needed … and watched his bank account dwindle.
  • We’d need sets, actors, cameramen, sound people … and more importantly, money to pay those people.

If the ellipses is in the middle of a sentence where it is more “stuttering” or hesitating, it looks like this:

  • I… I don’t know. 
  • Wh… What?

MORE Ellipses Examples

No Space before—new idea after ellipses… 

  • Gabriella tells her, “Like you… yes… I see a part of myself in your face, the way you are looking at me now.” 
  • He helped them start the genocide that’s happening where I was born, blinding them into believing they were gods… that they have the power over life and death. 
  • It’d break her heart to hear… and you and I both know I shouldn’t be naysaying a gift. 
  • I would say I like to go out in that rec yard, but it’s a concrete box with mesh over my head… still walls. No need to belabor that… I’m fucking done. 
  • But this… this type of thing, she can’t investigate. 
  • Wilson’s dead… my boy… my legacy is dead, but I’ll be goddamned if my legacy will be some bitch sitting in my house. 
  • He swirls the brown liquid in the cup, teasing spilling it on her white couch… messing with her some. 
  • I know you have something you want to say… Not speaking isn’t an easy thing for you. 
  • I… I don’t know.

Space—pause within same idea … within the sentence (Christopher Walken style) 

  • “They are evil. Devils … destroying what was a great country, a great people.” 
  • Some places … like the one I was at before all this started, they had good food. 
  • Her face absorbs the seriousness of the space … and the death. 
  • Tanner … Brogdon is not just some pretty boy. 
  • That you exaggerated or lied about … some truth.

Both space and no space in the same sentence! 

  • He thought … he couldn’t accept that by working with those … savages who now control the South… He thought he could control everyone. 
  • Either you embellished it or something, or you made it up… Either way … it hurts your credibility.

The bottom line is that ellipses are hard, but they can be mastered by following a few simple rules. Think about the clauses in your sentence and use that as your guide for spacing!